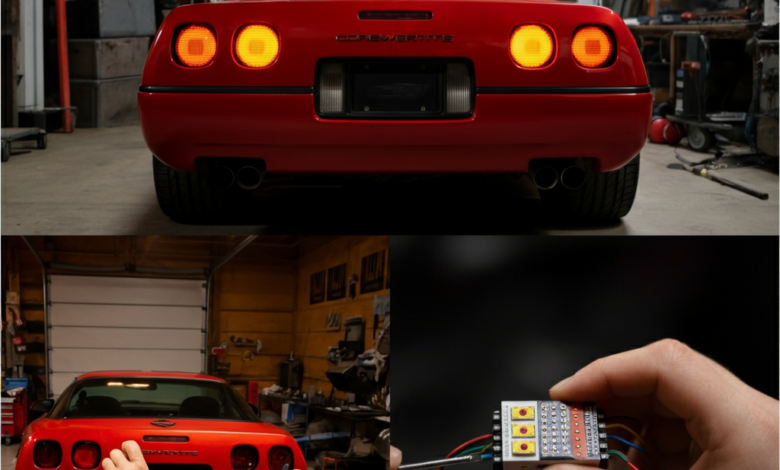
The 1992 Corvette is a true classic, celebrated for its sleek design, powerful engine, and advanced features for its time. For Corvette enthusiasts, maintaining and upgrading this iconic vehicle often involves paying meticulous attention to detail. One popular upgrade is replacing the standard tail lights with modern LED lights, enhancing both the car’s aesthetics and safety. However, transitioning to LED tail lights isn’t as straightforward as it may seem—especially with the 1992 Corvette. This guide will explain why load resistors are crucial for your LED upgrade and walk you through the entire process, step by step.
By the end of this article, you’ll know how to remove the tail lights, install LED load resistors, and ensure a flawless upgrade for your Corvette!
Why Use LED Load Resistors for the 1992 Corvette?
Before making the switch, it’s crucial to understand the role of load resistors when upgrading to LED tail lights. The 1992 Corvette, like many older vehicles, uses a system designed for incandescent bulbs that require a specific electrical load to function correctly. When you replace these with LEDs—which draw significantly less power—it can cause several issues, such as:
- Hyper-Flashing: The turn signals flash at an abnormally fast speed.
- Burnt-Out Bulb Errors: Even though your LED bulbs work, the dashboard may mistakenly display a “burnt-out bulb” warning.
- Flickering Lights: LEDs may flicker due to inconsistencies in the power supply.
Load resistors simulate the electrical load of incandescent bulbs, ensuring your LEDs work seamlessly with your Corvette’s electrical system. They’re an essential component for a hassle-free upgrade.
Challenges with the 1992 Corvette’s Tail Lights
Replacing the tail lights on a 1992 Corvette presents unique challenges. Here are some of the most common issues Corvette owners report:
- Limited Space for Installation
The compact design of the tail light cavity doesn’t leave much room for additional components, like load resistors.
- Specialized Wiring
The 1992 Corvette’s wiring harness requires careful handling to avoid damaging the connectors.
- Compatibility Issues
Not all LED bulbs and resistors are compatible with the Corvette’s electrical system, so choosing the right products is key.
These challenges make it especially important to approach the process with a step-by-step plan, as detailed below.
Step-by-Step Guide to Removing the Tail Lights
Upgrading your Corvette’s tail lights begins by removing the old ones. Follow these steps to safely remove the 1992 Corvette’s tail lights:
Tools You’ll Need
- Phillips screwdriver
- Flathead screwdriver
- Socket wrench
- Work gloves
- Trim removal tool (optional but helpful)
Steps
- Locate the Tail Light Assembly
Open your Corvette’s rear hatch and stand directly behind the vehicle. The tail light assemblies are on either side of the rear bumper.
- Access the Screws
Use the Phillips screwdriver to remove the screws securing the tail light covers. Depending on your Corvette’s condition, you may also need a socket wrench to loosen additional bolts securing the assembly.
- Gently Remove the Tail Light
Once the screws are removed, carefully pull the tail light housing out of the socket. Use a trim removal tool or a flathead screwdriver wrapped in a cloth to avoid scratching your paint.
- Disconnect the Wiring
Before removing the bulb, disconnect the wiring harness by pressing the release clips at the back of the assembly.
At this stage, your tail light is fully removed, and you’re ready to proceed with installing your LED lights and load resistors.
Installing LED Load Resistors
Here’s how to properly install load resistors and upgrade to LED tail lights without experiencing hyper-flashing or burnt-out errors.
What You’ll Need
- LED load resistors (ensure they’re compatible with the 1992 Corvette)
- Electrical tape
- Wire connectors or splicing tools
- Zip ties
Steps
- Attach the Load Resistor
Connect the load resistor to the positive and negative wires of the LED bulb. Most load resistors come with instructions, but generally, they are installed in parallel with the bulb (not in series).
- Secure the Load Resistor
Since load resistors can become hot during operation, use zip ties to secure them away from sensitive components like plastic or wiring.
- Test the System
Before fully reassembling the tail light housing, test the lights to ensure they’re functioning correctly. Check for hyper-flashing, flickering, or error codes on the dashboard.
- Reconnect and Reassemble
Once you’re satisfied with the performance, reconnect the wiring harness, position the bulb in its housing, and replace the tail light assembly.
Following these steps will ensure your LED tail lights work seamlessly with your Corvette’s system.
Tips for a Successful LED Tail Light Upgrade
- Choose High-Quality Parts
Not all LED bulbs and resistors are created equal. Stick to reputable brands to avoid compatibility or durability issues.
- Use Heat-Resistant Materials
Load resistors generate considerable heat. Make sure you secure them to surfaces that can handle high temperatures.
- Avoid Cutting Wires
If possible, use plug-and-play connectors to connect resistors without permanently altering your Corvette’s wiring.
- Double-Check Polarity
LEDs are polarity-sensitive, meaning they only work when connected the right way. If the light doesn’t turn on after installation, simply reverse the connection.
- Consult a Professional
If you’re not confident in your ability to handle electrical components, seek help from a trusted mechanic.
Illuminate Your 1992 Corvette with LED Tail Lights
Switching to LED tail lights on your 1992 Corvette is more than just a visual upgrade—it’s a safety improvement and a step toward modernizing your classic ride. While the process requires attention to detail, installing load resistors ensures your LEDs perform flawlessly.